- Close a wound using aseptic technique.
Steri-Strips
- Do not apply Steri Strips tightly around fingers.
- Do not use strong disinfectants such as Betadine, Hibitane or Hydrogen Peroxide on wounds.
- High pressure irrigation of wounds (greater than 8psi) can seriously interfere with healing, kill cells and allow bacteria to infiltrate the tissue.
- Needle stick injury.
- Suturing of facial regions and hands should be avoided and attended to only by suitably skilled physicians.
- A contaminated wound that is sutured will become infected and scar.
- Antiseptic Medi-Prep Cetrimide (skin prep) is not to be applied to open wounds, only apply to wound margins (when applying Steri Strips).
- All relevant infection control methods to be utilised.
- Control bleeding as per Haemorrhage Clinical Practice Guideline
- Contact appropriate Medical Officer and give full status of patient and description of the wound. Send photo if able to do so.
- Prepare equipment required:
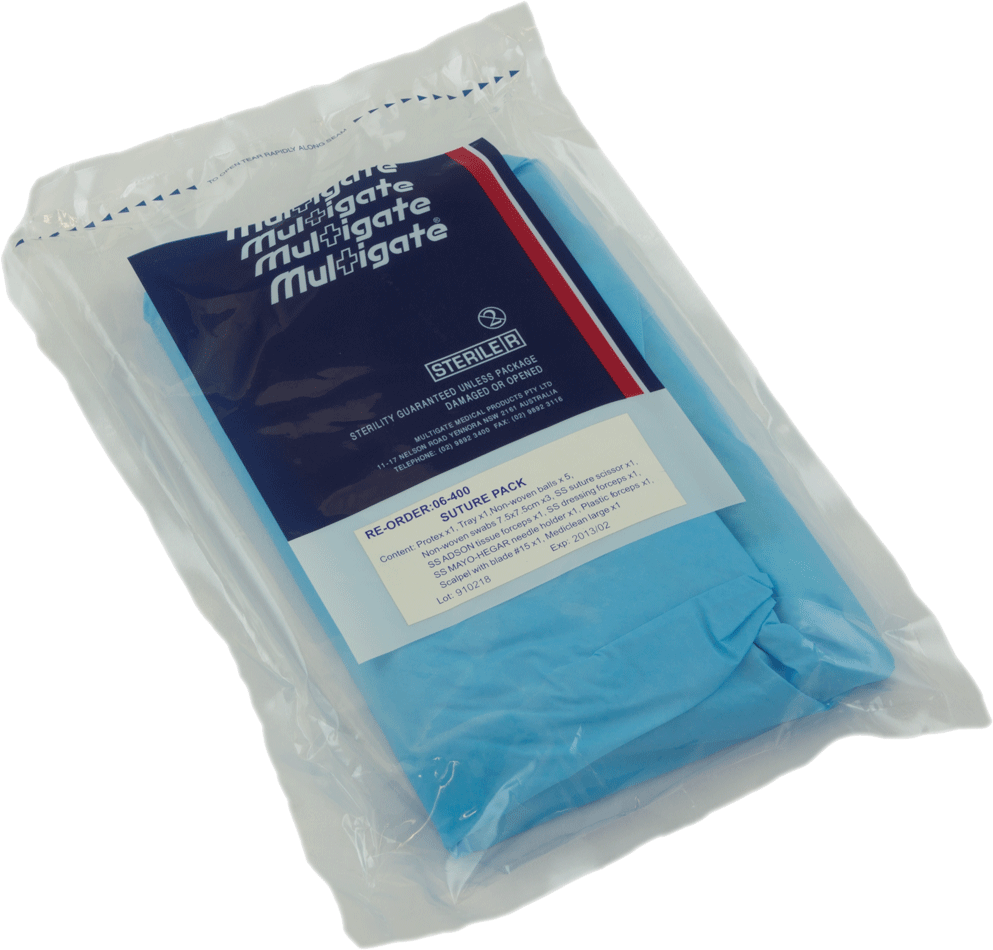
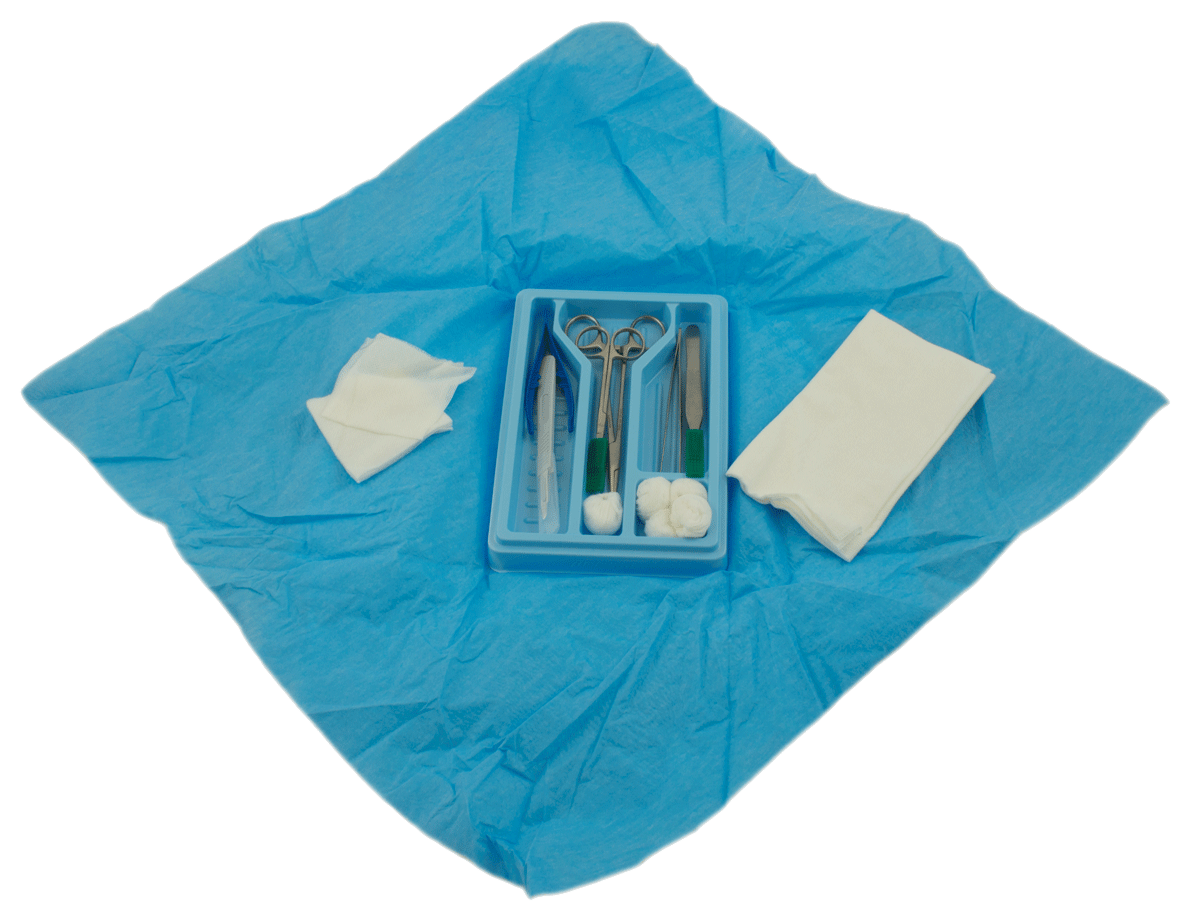
- Sterile dressing pack
- 5 or 20mL syringe
- 1-4 x 5mL ampoule 1% lignocaine (warmed to body temperature)
- 2 x 18g needle or blunt needle
- 23g needle
- Suture material (sterile) silk or nylon
- Sterile dissecting forceps (tweezers)
- Sterile needle holder
- Curved reverse cutting needle
- Sterile fine sharps (scissors)
- Alcohol swabs
- Sterile surgical gloves
- Sharps container
- 50mL syringe
- Sterile dressing material
- Normal saline 30mL steritube
- Chlorhexidine 30mL steritube
- Iodine (Betadine) diluted 1:10 in saline
- Open dressing pack with the tips of your fingers and spread out on sterile work surface. Peel open all packaging, dropping contents onto sterile dressing field without handling. Pour cleaning solution into pot.
- Draw up 5-20mL of 1% lignocaine using an 18g needle in a 10 or 20mL syringe. Dispose of 18g needle and replace with a 23g needle. Place 18g needle in outer 5cm of sterile dressing field.
- Position patient supine/semi-recumbent.
- Place incontinence sheet under wound.
- Wash hands thoroughly, dry and apply non-sterile gloves.
Wound cleaning
- Remove all contaminants and devitalised tissue before wound closure to decrease the risk of infection and a cosmetically poor scar.
- Wash hands.
- Open sterile glove (inner packet).
- Gloves are marked left and right. Place dominant hand into correct glove. Use other hand to pull on the glove by holding the glove from the inside cuff. Repeat with the other hand, except pull the glove on by grabbing the cuff from the outside face of the glove.
- Using one sterile forcep soak gauze or cotton in cleaning solution and with another forcep transfer gauze to other hand. Clean the wound in a circular motion working from the centre of the wound and moving outwards, changing swabs regularly.
- Irrigate with sterile saline (50-100mL saline/cm of laceration) drawn-up and administered by an 18g needle attached to a 50mL syringe. Irrigate away from the clean area to prevent contamination, until all visible particles are removed.
- Use a scalpel/scissors to debride (remove) dead tissue, firmly adherent wound contaminants (e.g. grease or paint), macerated or ragged wound edges.
- Dry intact skin with sterile gauze. The wound should appear pink and viable with no visible contaminants.
- When finished dispose of forceps and swabs.
- Using a sterile sheet, find the middle and tear/cut a small hole through which the wound can be visualised.
Anaesthetic
- Before suturing a local anaesthetic must be given.
- Using lignocaine syringe with bevel up on a slight angle insert the needle with a short sharp movement into the subcutaneous tissue (not intradermal which is more painful) near the end of the wound. Draw back and if clear inject local anaesthetic whilst slowly withdrawing the needle, leaving a "track" of anaesthetic.
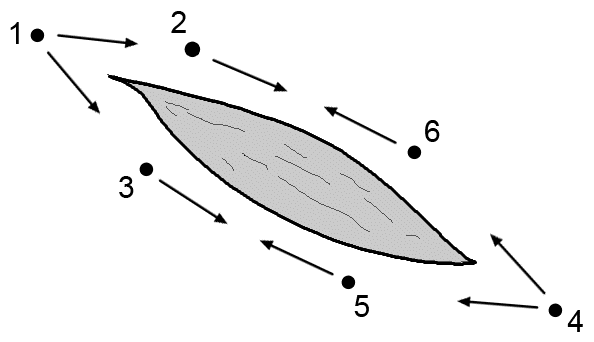
- Continue injections as per numbered area (1) placing the needle in the direction of the arrows. Depending on the length and shape of the wound numbers 2,3,5 and 6 may not be necessary, or more injections may be required.
- Place unused lignocaine in the outer 5cm of dressing pack in case it is required later.
- Allow 10 minutes for lignocaine to work.
- Remove and dispose of dirty gloves.
Suturing
- Ensure wound is numb, if not administer more anaesthetic.
- Select suture size:
- Gauge 2.0 (3 metric) for scalp lacerations,
- Finer 4.0 (1.5 metric) for hand lacerations,
- 5.0 or 6.0 (0.7) for facial wounds.
- The thicker the gauge of suture the greater the amount of foreign body introduced into the wound and potential for scarring.
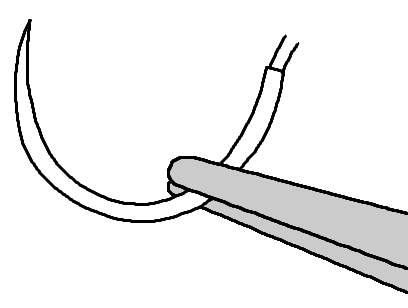
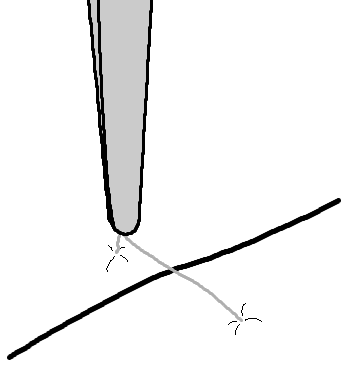
- Using a sterile needle holder pick up the suturing needle (2).
- The needle must NOT be held near the end or it will bend and possibly break in the tissues.
- Match the wound edges looking for identifying marks. Place one suture somewhere near the middle of the wound and observe how the wound ‘comes together’. If this does not ‘look right’ then cut the suture and try again.
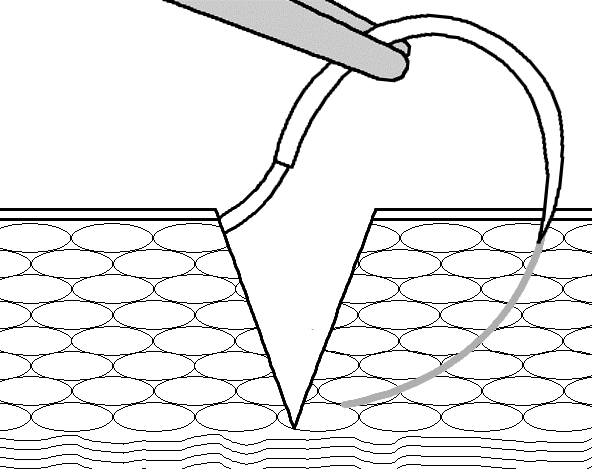
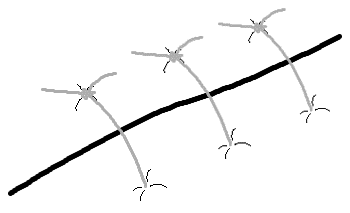
- Throw the first stitch. Aim to close the wound fully by placing the suture at the deepest part of the wound (3).
- Bite deep into the wound down to the base.
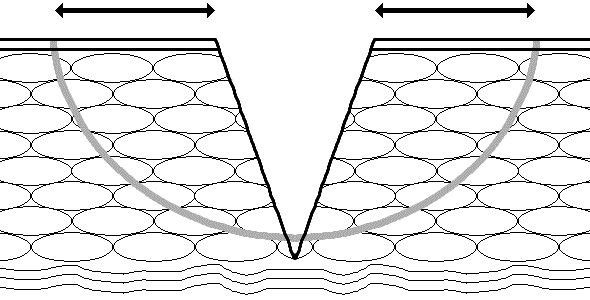
- The greater the distance from the wound edge to the needle entry point, the deeper the bite of the needle.
- Distance from the stitch to the wound edge much be equilateral[4], otherwise a step will occur at the adjoining edges of the laceration.
- Assume the suture has been placed starting from the right moving left across the wound. Take the needle in the left hand with the needle holder in the right.
- The needle holder lies against the suture. Wrap the suture over and around the instrument three times away from you.
- Take hold of the end of the suture with the jaws of the needle-holder.
- Pull this first ‘throw’ down. The left hand goes to the right and vice versa (cross the hands). The knot should now lie ‘flat’. Tension the suture to align the wound edges (approximate).
- Let the end of the suture go. The ‘short end’ should now lie to the left with the knot flat across the wound.
- Bring the suture against the needle-holder and wrap the suture around the needle three times toward you.
- Take hold of the ‘short end’ with the needle-holder.
- Pull this second ‘throw’ down onto the first. The left hand pulls to the left, the right to the right.
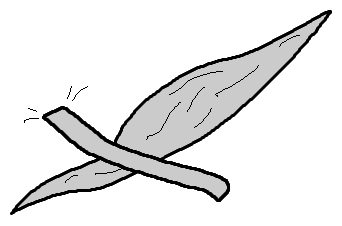
- Tension the knot off so that the knot lies to the left of the wound (5).
- Cut the suture 0.5cm from the wound. Take care with nylon which will tend to slip. Leave longer or put an extra knot on.
- Continue stitches until the wound is fully closed, tying off to the left of the wound.
- Cover with appropriate sterile dressing and bandaging.
- Detail follow-up, any abnormalities or complications, appointments and care of the wound with the patient.
- Record all details.
Suture Removal
- The location of the wound and the state of wound healing determine when sutures are removed. Sutures should be removed early enough to avoid suture marks but late enough to prevent the wound from reopening.
| Location of Wound | Time to Removal |
|---|---|
| Arms/legs/hands/feet | 10-14 days |
| Ears | 4-6 days |
| Eyebrows | 4-5 days |
| Eyelids | 2 days |
| Face/lips | 3-5 days |
| Joints | 14 days |
| Scalp/trunk | 7-10 days |
- Expose the wound.
- Examine for possible infection or other problems (contact Medical Officer).
- Check wound is ready for suture removal. If not, leave for 2 days and reassess. Consider removing every other suture or reinforce wound edges with Steri Strips.
- Using forceps/tweezers grab hold of the knot.
- Pull slightly up allowing for one side of the suture to be exposed.
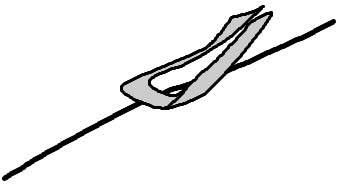
- Using scissors cut the suture directly under the knot closest to the skin (6).
- Pull, removing the suture though the wound.
- Clean surface of wound with normal saline.
- Reapply dressing and bandaging if required.
- Record details, instruct patient to return if any further problems occur.
- Inspect at 1, 3 and 5 days for swelling, pain or bleeding.
Steri-Strips
- These paper adhesive strips are widely used as they are quick and painless to apply and are less likely to cause tissue ischemia.
- They are very useful in:
- Conjunction with sutures.
- Children.
- Flap lacerations, especially in pre–tibial lacerations in the elderly.
- Some finger injuries.
- Skin closure in wounds where a deep layer of sutures has approximated the skin edges.
- However, they should not be used as a ‘short cut’ in wound care. It is essential that proper wound cleaning and exploration be carried out if indicated.
- Expose and clean the wound.
- Apply Antiseptic Medi-Prep Cetrimide around the perimeter of the wound and leave for 30 seconds to dry.
- Apply Steri Strip (7) to one edge of the wound, align and bring the wound together. Use as many strips as necessary.
- Protect wound with appropriate sterile dressings and bandaging.
- Inspect at 1, 3 and 5 days for swelling, pain or bleeding.
- Leave a space between each steri strip for exudate to escape.
Steri-Strip Removal
- Remove strips by lifting the edges from either end of the strip (8) bringing the two ends together carefully.
- Continue to lift away, changing direction along the wound (9), pull away until free.
| Settings | |
|---|---|
| Extended Care: | |
| Colour assist: | |
Document Control
Clinical Resources Website
St John Ambulance Western Australia Ltd (ABN 55 028 468 715) (St John WA) operates ambulance and other pre-hospital clinical services. St John WA’s Clinical Resources, including its Clinical Practice Guidelines (Clinical Resources), are intended for use by credentialed St John WA staff and volunteers when providing clinical care to patients for or on behalf of St John WA, within the St John WA Clinical Governance Framework, and only to the extent of the clinician’s authority to practice.
Other users – Terms of Use
The content of the St John WA Clinical Resources is provided for information purposes only and is not intended to serve as health, medical or treatment advice. Any user of this website agrees to be bound by these Terms of Use in their use of the Clinical Resources.
St John WA does not represent or warrant (whether express, implied, statutory, or otherwise) that the content of the Clinical Resources is accurate, reliable, up-to-date, complete or that the information contained is suitable for your needs or for any particular purpose. You are responsible for assessing whether the information is accurate, reliable, up-to-date, authentic, relevant, or complete and where appropriate, seek independent professional advice.
St John WA expressly prohibits use of these Clinical Resources to guide clinical care of patients by organisations external to St John WA, except where these organisations have been directly engaged by St John WA to provide services. Any use of the Clinical Resources, with St John WA approval, must attribute St John WA as the creator of the Clinical Resources and include the copyright notice and (where reasonably practicable) provide a URL/hyperlink to the St John WA Clinical Resources website.
No permission or licence is granted to reproduce, make commercial use of, adapt, modify or create derivative works from these Clinical Resources. For permissions beyond the scope of these Terms of Use, including a commercial licence, please contact medservices@stjohnambulance.com.au
Where links are provided to resources on external websites, St John WA:
- Gives no assurances about the quality, accuracy or relevance of material on any linked site;
- Accepts no legal responsibility regarding the accuracy and reliability of external material; and
- Does not endorse any material, associated organisation, product or service on other sites.
Your use of any external website is governed by the terms of that website, including any authorisation, requirement or licence for use of the material on that website.
To the maximum extent permitted by law, St John WA excludes liability (including liability in negligence) for any direct, special, indirect, incidental, consequential, punitive, exemplary or other loss, cost, damage or expense arising out of, or in connection with, use or reliance on the Clinical Resources (including without limitation any interference with or damage to a user’s computer, device, software or data occurring in connection with such use).
Cookies
Please read this cookie policy carefully before using Clinical Resources from St John WA.
The cookies used on this site are small and completely anonymous pieces of information and are stored on your computer or mobile device. The data that the cookies contain identify your user preferences (such as your preferred text size, scope / skill level preference and Colour Assist mode, among other user settings) so that they can be recalled the next time that you visit a page within Clinical Resources. These cookies are necessary to offer you the best and most efficient possible experience when accessing and navigating through our website and using its features. These cookies do not collect or send analytical information back to St John WA.
Clinical Resources does integrate with Google Analytics and any cookies associated with this service enable us (and third-party services) to collect aggregated data for statistical purposes on how our visitors use this website. These cookies do not contain personal information such as names and email addresses and are used to help us improve your user experience of the website.
If you want to restrict or block the cookies that are set by our website, you can do so through your browser setting. Alternatively, you can visit www.internetcookies.com, which contains comprehensive information on how to do this on a wide variety of browsers and devices. You will find general information about cookies and details on how to delete cookies from your device. If you have any questions about this policy or our use of cookies, please contact us.
