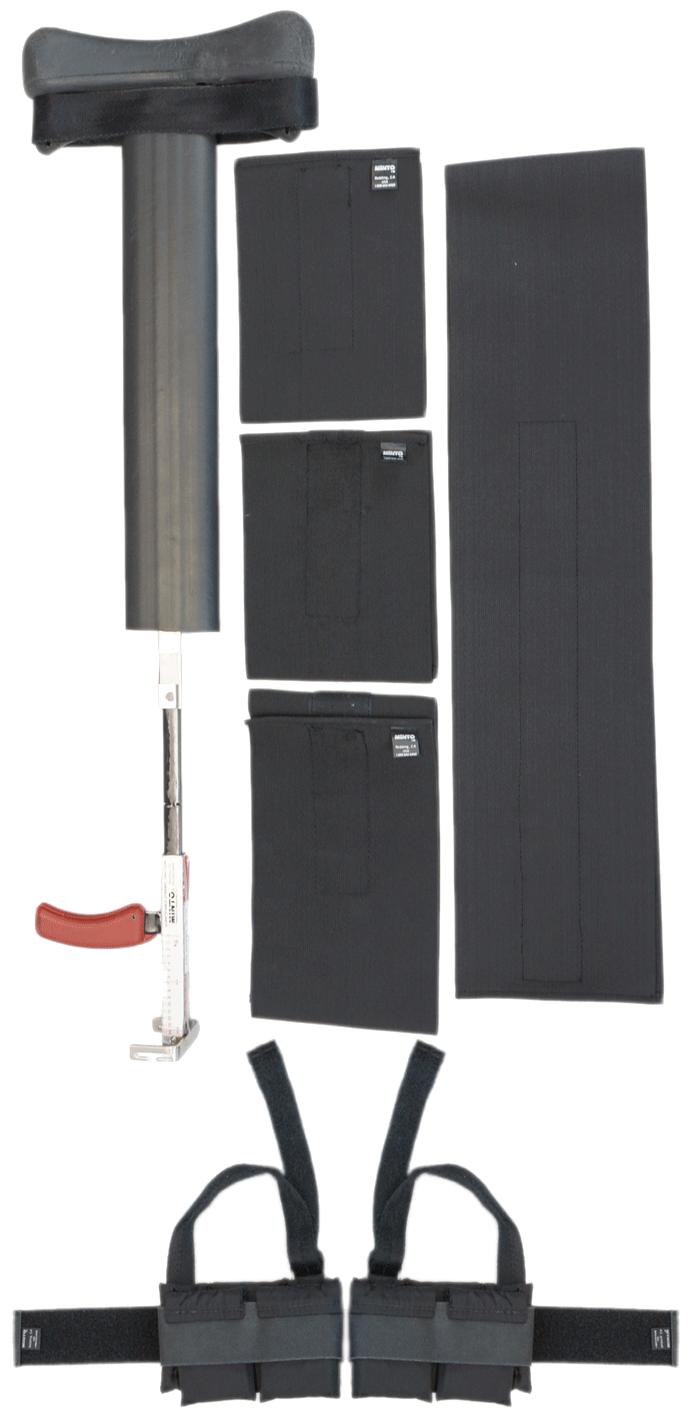
- Immobilise Proximal 1/3 and mid-shaft femoral fractures.
- Ankle or foot fractures
- Neck of femur fractures
- Pelvic fracture
- Significant knee injuries
- Supracondylar fractures of the distal end of the femur.
- Under a clinical setting this should not be removed unless directed to by a doctor or senior clinician.
- Assess distal neurovascular observations:
- Pulse, Colour / Warmth / Movement / Sensation (CWMS)
- Compound fractures.
- Do not apply leg straps over knee as this will cause misalignment and pain.
- Procedure is under the control of the person applying manual traction.
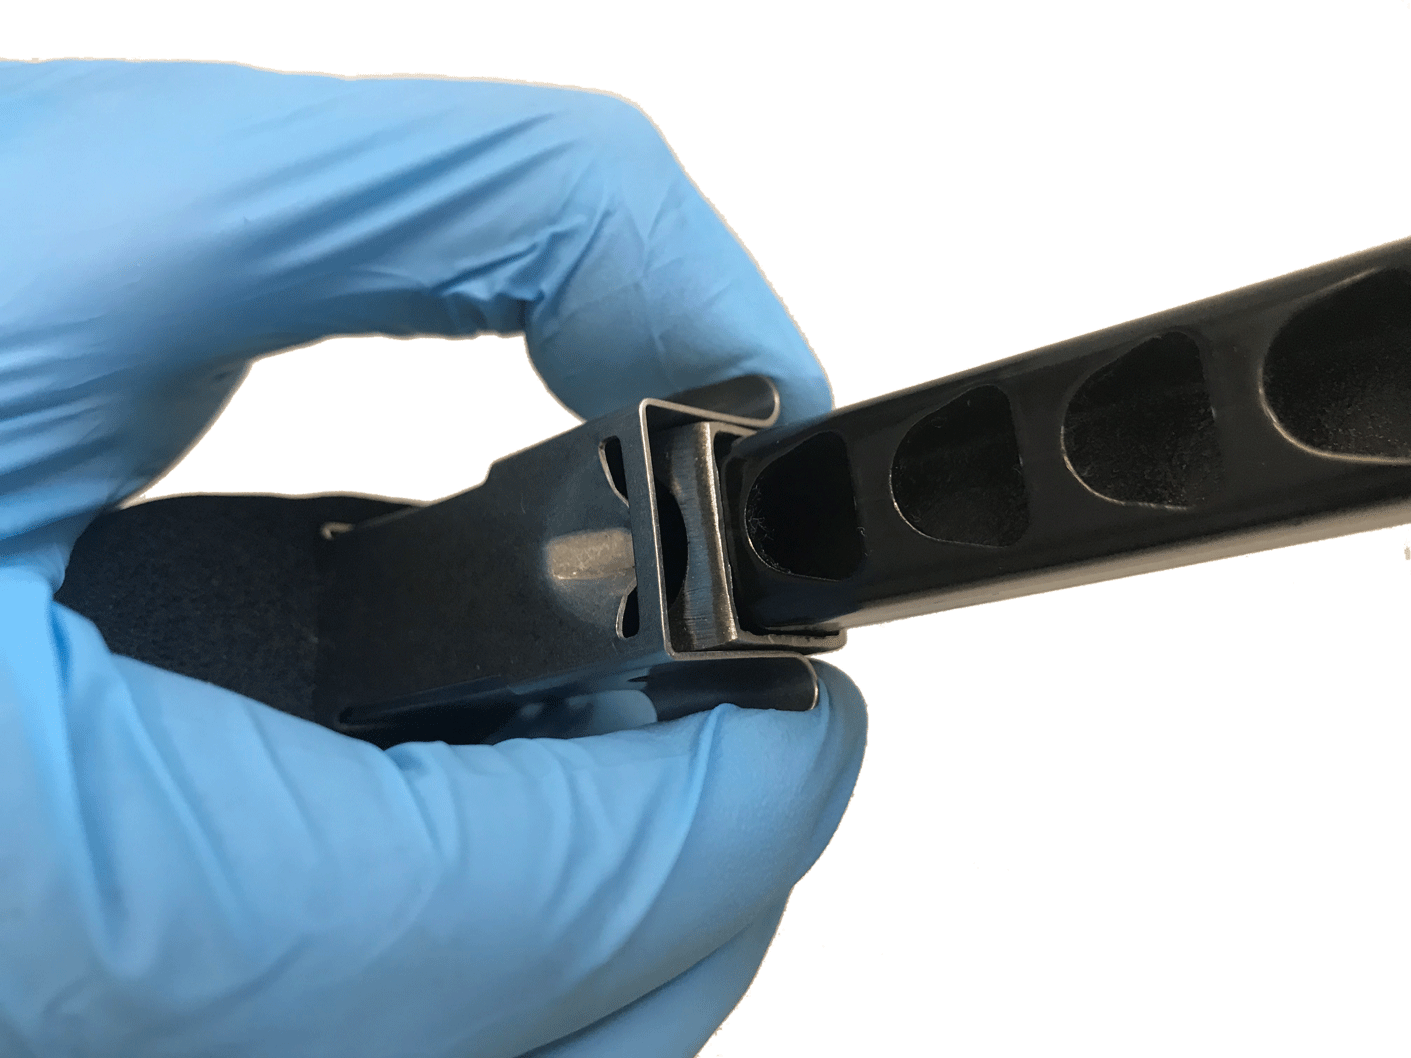
- Note the pinch point hazard. Utilise the correct technique, as per below image.
- All relevant infection control methods to be utilised.
- Prepare splint.
- Explain the procedure to the patient.
- Consider appropriate analgesia.
- Expose the injured leg completely, examine leg, check for pedal pulses, motor and sensory function.
- Apply manual inline traction if resources permit.
Unilateral Fracture
- Position the sager between the patient’s legs and move the uninjured leg away if possible.
- Rest the ischial perineal cushion against the ischial tuberosity with the shortest end of the base towards the ground and towards the same side as the injured leg. If male, the patient’s genitalia to be adjust to the opposite side to prevent trauma.
- If appropriate, place a trauma dressing under the thigh strap for patient comfort. Secure the thigh strap around the upper thigh of the injured limb by holding the splint firmly in place while tightening the strap to ensure a firm but comfortable fit and allow blood circulation.
- Prepare the ankle harness by folding down the required amount of cushioning.
- Wrap the ankle harness snugly around the ankle above the melleoli.
- Place one hand on the ischial perineal cushion, and thumb and index finger of the other hand to be used to bring the spring clip up towards the ischial perineal cushion to release the spring. Lift the spring clip and extend the chrome inner shaft until the crossbar lines up with the patient’s heel.
- Attach the ankle harness strap to the cross bar.
- Adjust the traction straps until tight between the harness and the cross bar.
- Adjust the ankle harness strap until tight between the ankle harness and cross bar, refer to the guide below:
- 10% of patient’s body weight per femur.
- Maximum 7kg per femur for adults and 3.5kg per femur for children.
- Slide the securing straps in under both legs by pushing it in from one side and then pulling it through to the other side.
- As these straps are elastic do not over tighten them, this will cause more pain and discomfort, tighten to provide support.
- Recheck patient before and after any movement. Check distal pulses, pain and motor and sensory functions.
- Adjust traction as per point 4. If required by maintaining manual traction.
- Slowly adjust to the position desired in the clinical setting or for removal during a training session. Note the potential for pinch points.
Bilateral fracture
- Attach the splint to the side with the greatest degree of injury with the articulating base towards the injured leg.
- Attach additional ankle harness to second leg.
- Secure the figure 8 securing strap or triangular bandage to ankles.
Use lips to lift lock – approach from the ischial pad side to void pinch point

| Settings | |
|---|---|
| Extended Care: | |
| Colour assist: | |
Document Control
Clinical Resources Website
St John Ambulance Western Australia Ltd (ABN 55 028 468 715) (St John WA) operates ambulance and other pre-hospital clinical services. St John WA’s Clinical Resources, including its Clinical Practice Guidelines (Clinical Resources), are intended for use by credentialed St John WA staff and volunteers when providing clinical care to patients for or on behalf of St John WA, within the St John WA Clinical Governance Framework, and only to the extent of the clinician’s authority to practice.
Other users – Terms of Use
The content of the St John WA Clinical Resources is provided for information purposes only and is not intended to serve as health, medical or treatment advice. Any user of this website agrees to be bound by these Terms of Use in their use of the Clinical Resources.
St John WA does not represent or warrant (whether express, implied, statutory, or otherwise) that the content of the Clinical Resources is accurate, reliable, up-to-date, complete or that the information contained is suitable for your needs or for any particular purpose. You are responsible for assessing whether the information is accurate, reliable, up-to-date, authentic, relevant, or complete and where appropriate, seek independent professional advice.
St John WA expressly prohibits use of these Clinical Resources to guide clinical care of patients by organisations external to St John WA, except where these organisations have been directly engaged by St John WA to provide services. Any use of the Clinical Resources, with St John WA approval, must attribute St John WA as the creator of the Clinical Resources and include the copyright notice and (where reasonably practicable) provide a URL/hyperlink to the St John WA Clinical Resources website.
No permission or licence is granted to reproduce, make commercial use of, adapt, modify or create derivative works from these Clinical Resources. For permissions beyond the scope of these Terms of Use, including a commercial licence, please contact medservices@stjohnambulance.com.au
Where links are provided to resources on external websites, St John WA:
- Gives no assurances about the quality, accuracy or relevance of material on any linked site;
- Accepts no legal responsibility regarding the accuracy and reliability of external material; and
- Does not endorse any material, associated organisation, product or service on other sites.
Your use of any external website is governed by the terms of that website, including any authorisation, requirement or licence for use of the material on that website.
To the maximum extent permitted by law, St John WA excludes liability (including liability in negligence) for any direct, special, indirect, incidental, consequential, punitive, exemplary or other loss, cost, damage or expense arising out of, or in connection with, use or reliance on the Clinical Resources (including without limitation any interference with or damage to a user’s computer, device, software or data occurring in connection with such use).
Cookies
Please read this cookie policy carefully before using Clinical Resources from St John WA.
The cookies used on this site are small and completely anonymous pieces of information and are stored on your computer or mobile device. The data that the cookies contain identify your user preferences (such as your preferred text size, scope / skill level preference and Colour Assist mode, among other user settings) so that they can be recalled the next time that you visit a page within Clinical Resources. These cookies are necessary to offer you the best and most efficient possible experience when accessing and navigating through our website and using its features. These cookies do not collect or send analytical information back to St John WA.
Clinical Resources does integrate with Google Analytics and any cookies associated with this service enable us (and third-party services) to collect aggregated data for statistical purposes on how our visitors use this website. These cookies do not contain personal information such as names and email addresses and are used to help us improve your user experience of the website.
If you want to restrict or block the cookies that are set by our website, you can do so through your browser setting. Alternatively, you can visit www.internetcookies.com, which contains comprehensive information on how to do this on a wide variety of browsers and devices. You will find general information about cookies and details on how to delete cookies from your device. If you have any questions about this policy or our use of cookies, please contact us.